


Here’s how to add Google Analytics 4 to your current analytics account using your existing Google Tag Manager account. If you don’t have a Google Tag Manager account, you should switch to it as soon as possible.
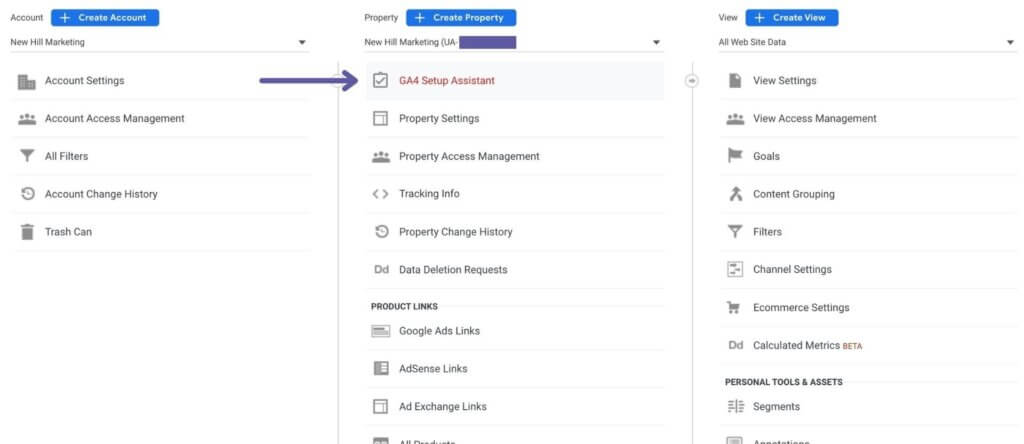
Step 1: Login and Choose GA4 Setup Assistant
Login to analytics.google.com and get into the account you want to add GA4 to.
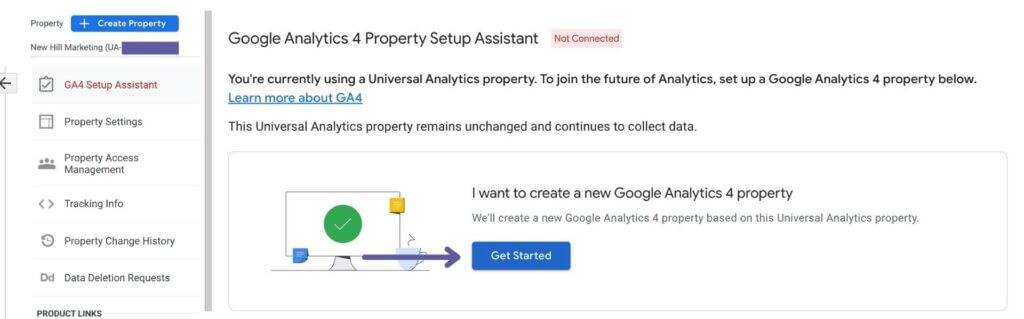
Step 2: Select Get Started
Step 3: Select Create Property

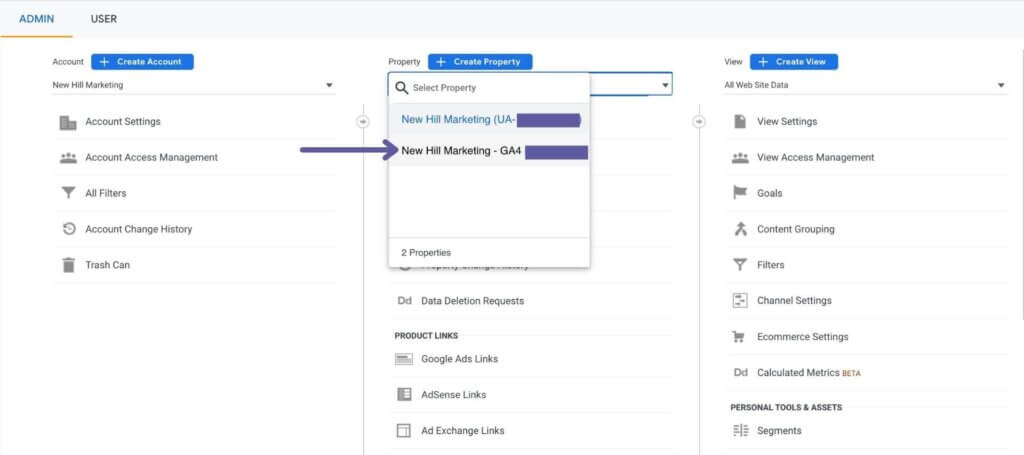
Step 4: View Your New Property
After step 3, the wizard will automatically create your new property, and you can view it by selecting the property that starts with GA4.
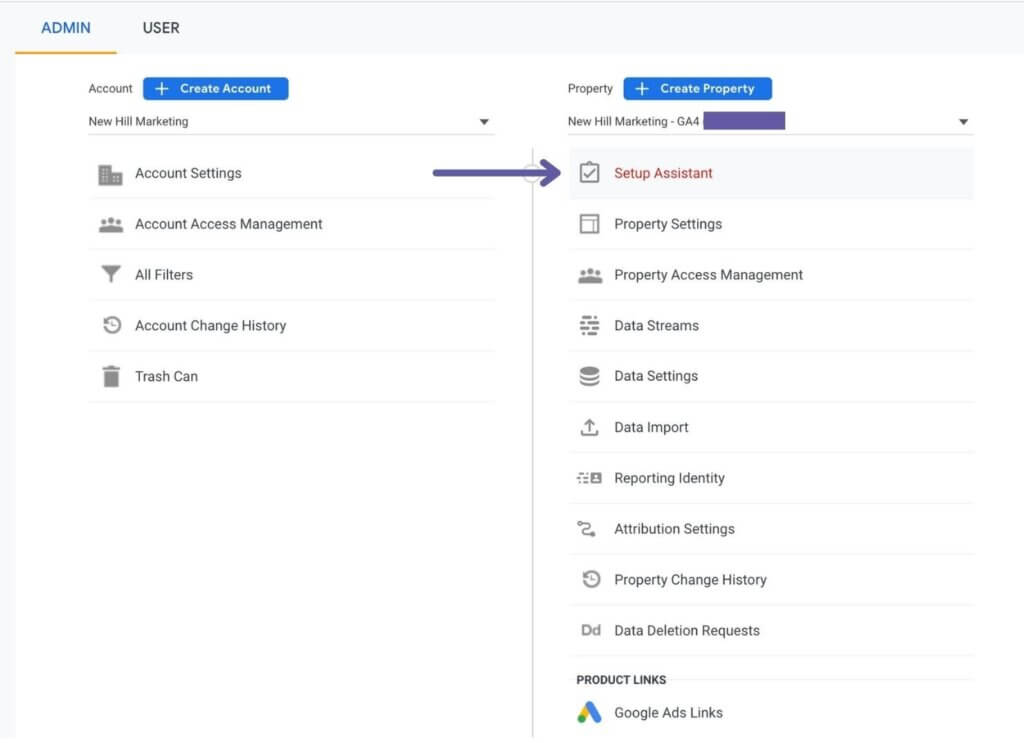
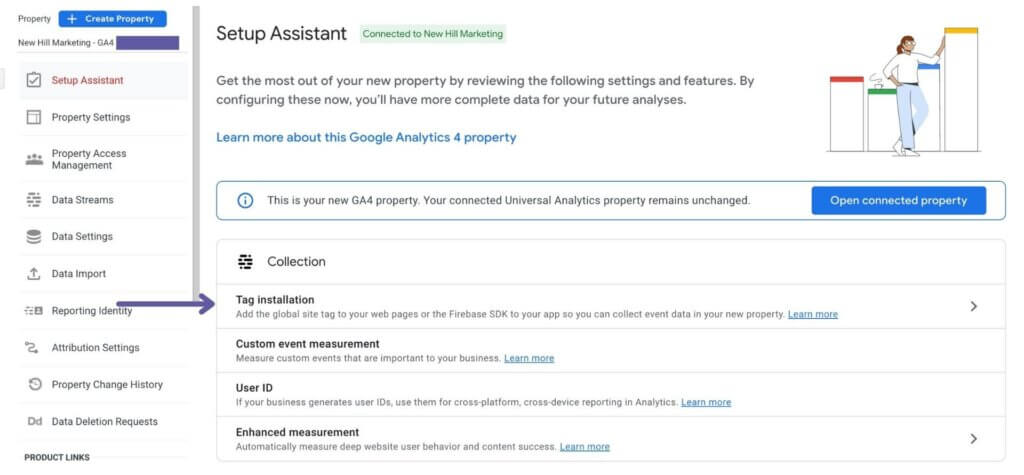
Step 5: Select Setup Assistant
Step 6: Select Tag Installation
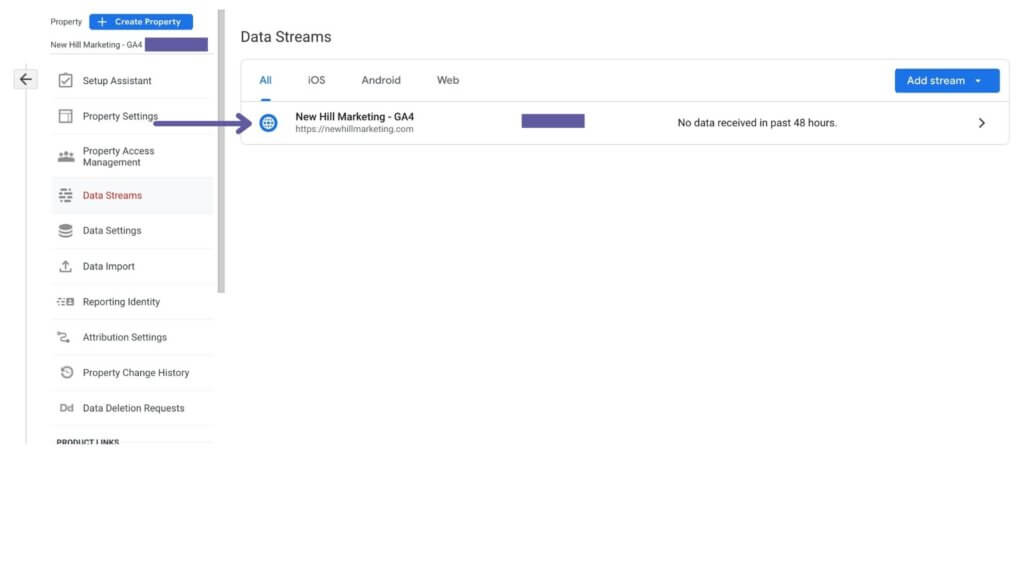
Step 7: Choose Your Data Stream
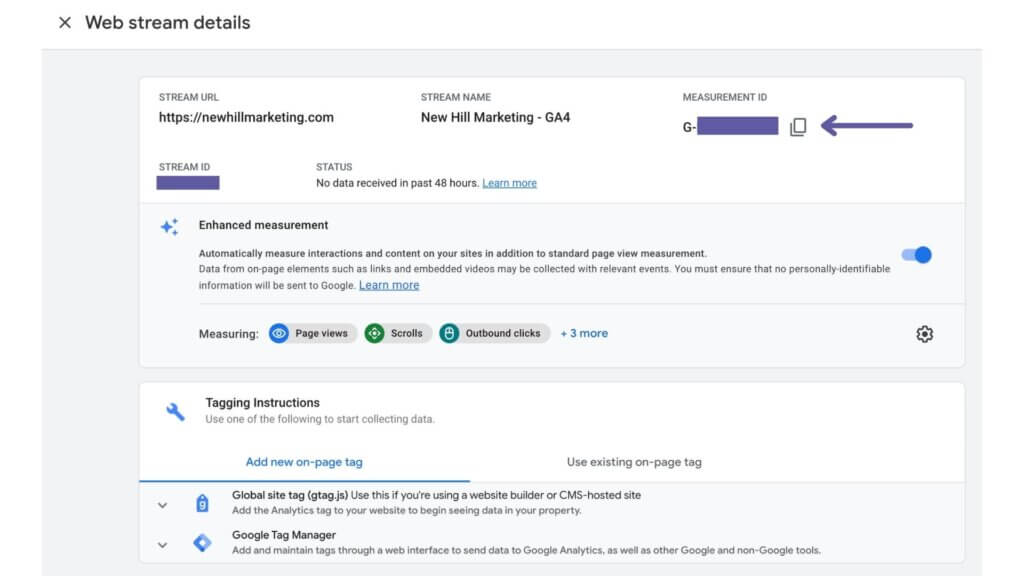
Step 8: Copy Your Measurement ID
Step 9: Go To Google Tag Manager
Login to your Google Tag Manager account by going to tagmanager.google.com. Then, Go to Tags, and choose New to create a new tag.

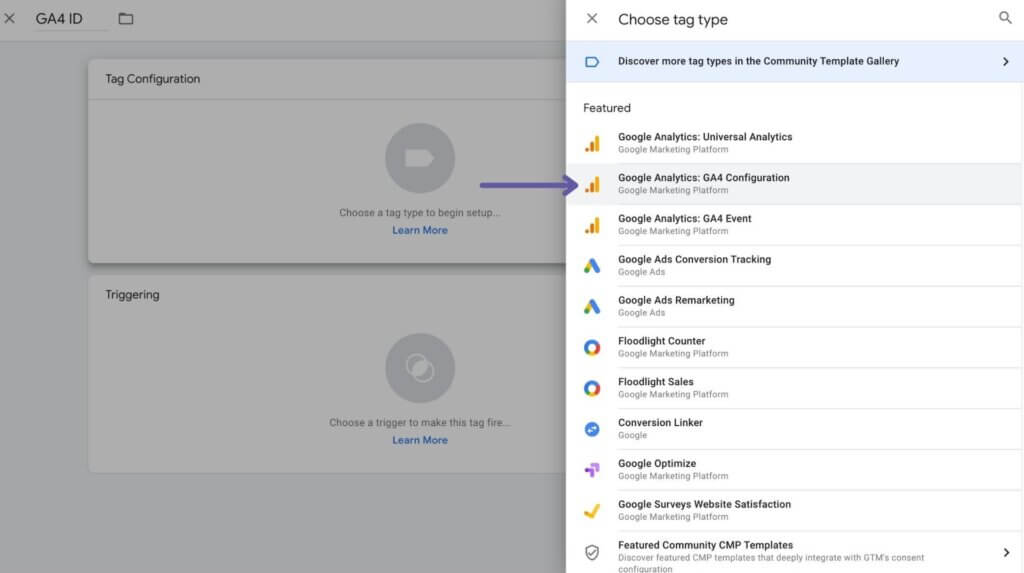
Step 10: Choose Google Analytics: GA4 Configuration
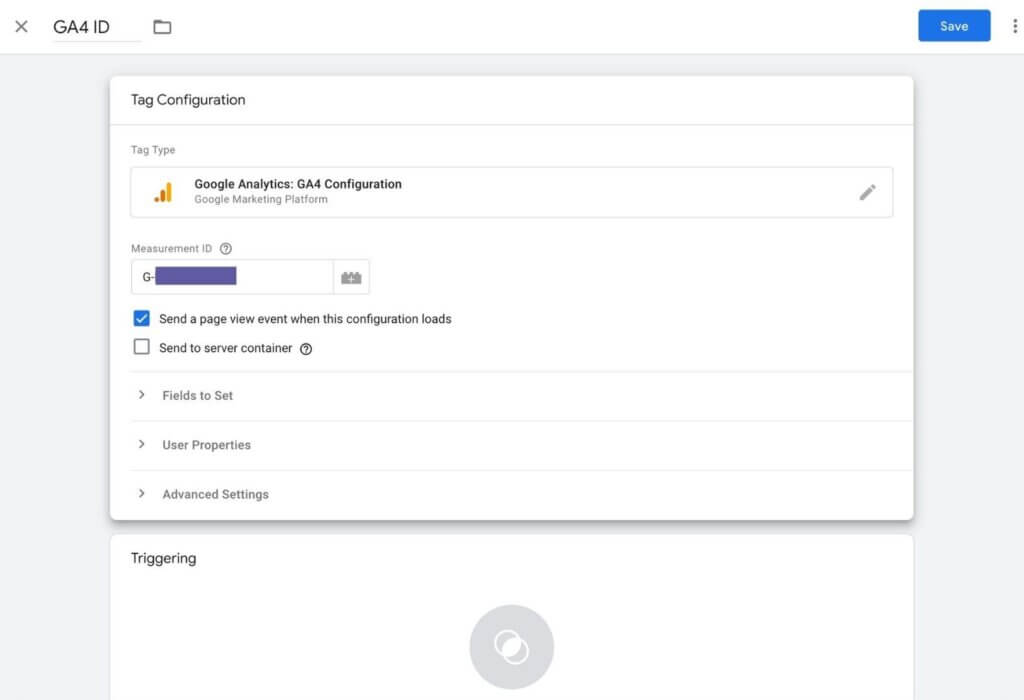
Step 11: Paste the Measurement ID
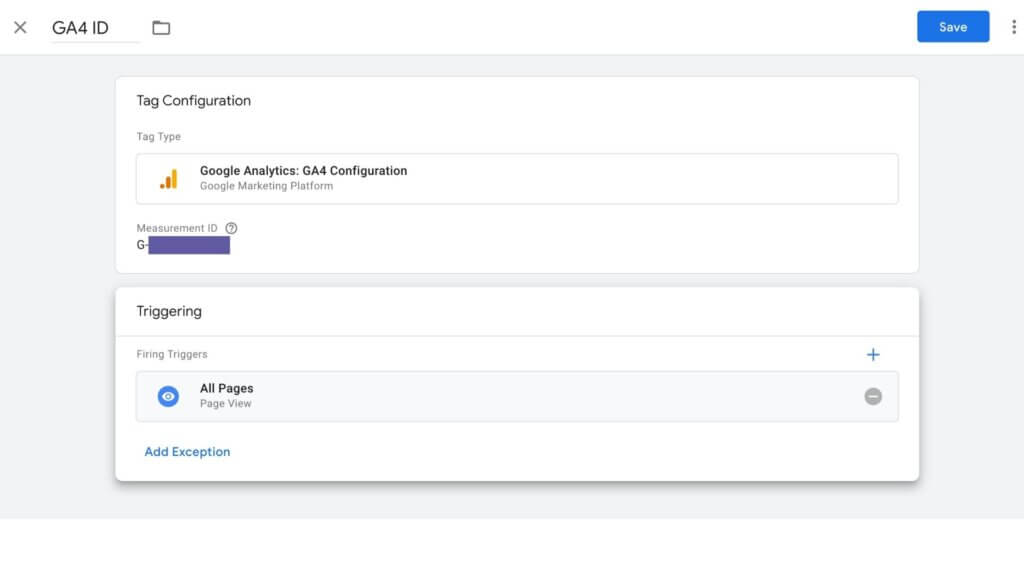
Step 12: Set the Triggering To All Pages Then Save
Make Sure To Publish!
After you save your new tag, make sure you hit publish within Google Tag Manager, and you’re set!
You’re Not Done Yet
Just because your new data stream is collecting data doesn’t mean you’re done yet. You still need to set your new GA4 property’s events. These include any forms or other lead generation tactics on your site.
GA4 may be great at tracking events, but you still have to set them up to track them. If you need help, contact me today! I’d love to help you set up your new GA4 account and start tracking the events that matter most to you.